Hi there,
There are many ways to prepare "Otak-otak", a dish reputed to originate from the Nyonyas. However, mummy's style is from her mother from Taiping, so I named this dish, "Otak-otak -- Taiping Lang Style". So I will show the ingredients and the methods used by mummy in pictorial form. The pictures are self explanatory and just by looking at the pictures, you will understand how to cook this dish. There is no hard and fast rules here. If not all the ingredients are available, never mind. As long as the main ingredients are there, then the dish would taste like the real thing. The main ingredients are:
(1) Fish. Any type of fish will do, as long as there are not too many bones.
(2) Gado-gado leaves. This is a must, in order to get that special taste. Some people don't like the smell of this type of leaves. Then they have not experienced the real otak-otak - Taiping Lang style.
(3) Spices: Lemon grass, gelangga, yellow ginger (Not too much!), small onions, candle nuts, dried chilli, and coconut suntan. The amount of spices is up to individual taste.
The following pictures should give you an idea of how to cook "Otak-otak" I start it off, by showing you some of the ingredients that you will need. Please read the captions to understand the procedure of cooking this dish.
 |
| Picture 1. Small onions. These must be peeled and washed. Then put aside to be blended later. |
 |
| Picture 2. You will also need dry chilli, candle nuts and fresh yellow ginger. |
 |
| Picture 3. This is Galangga. Choose the young shoots. Clean, peel and cut into smaller pieces for easy blending. |
 |
| Picture 4. You will need RM2.00 fresh coconut milk. |
 |
| Picture 5. You will need 6 sticks of lemon grass. Clean and cut into smaller pieces for easy blending. |
 |
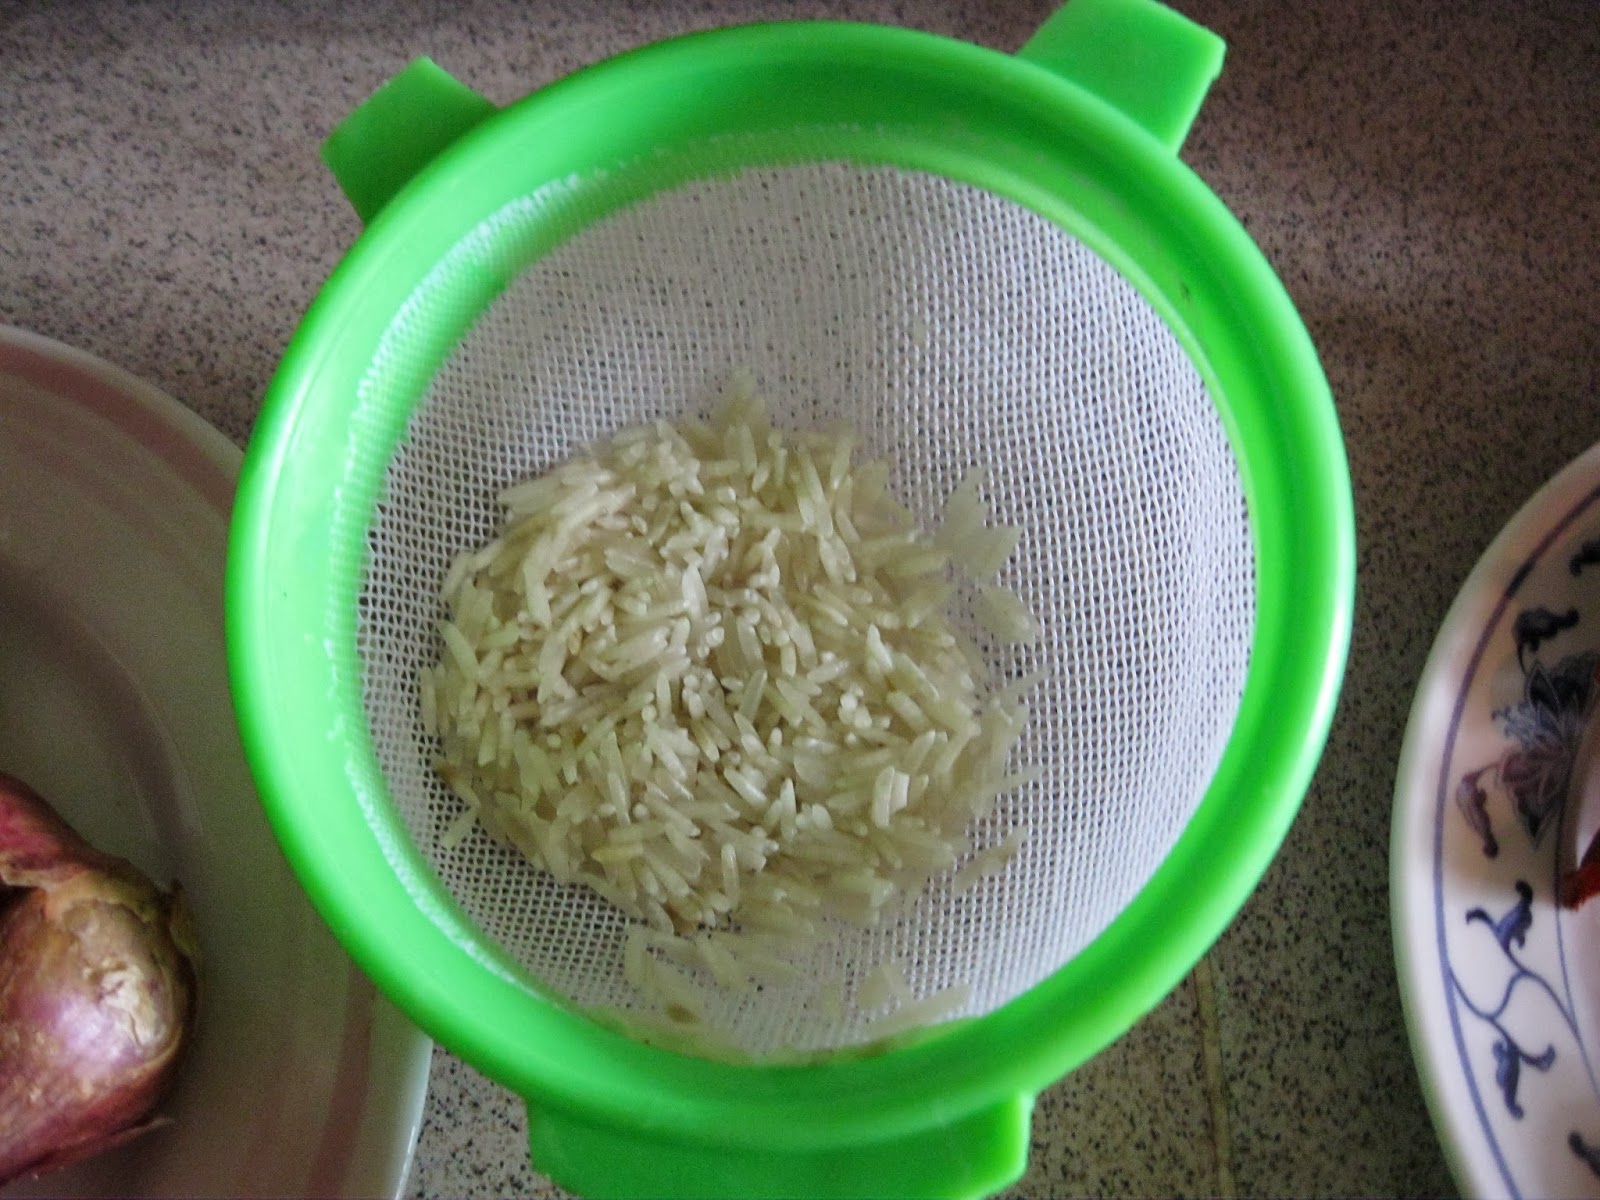
| Picture 6. You will need some ordinary white rice, about half a cup, to be blended into liquid. Washed and put aside. |
 |
| Picture 7. Boil the dry chilli until soft for easy blending. Remove the seeds if you don't want the dish to be too hot. |
 |
| Picture 8. This shows you the size of the fresh yellow ginger that you will need, and no more. |
 |
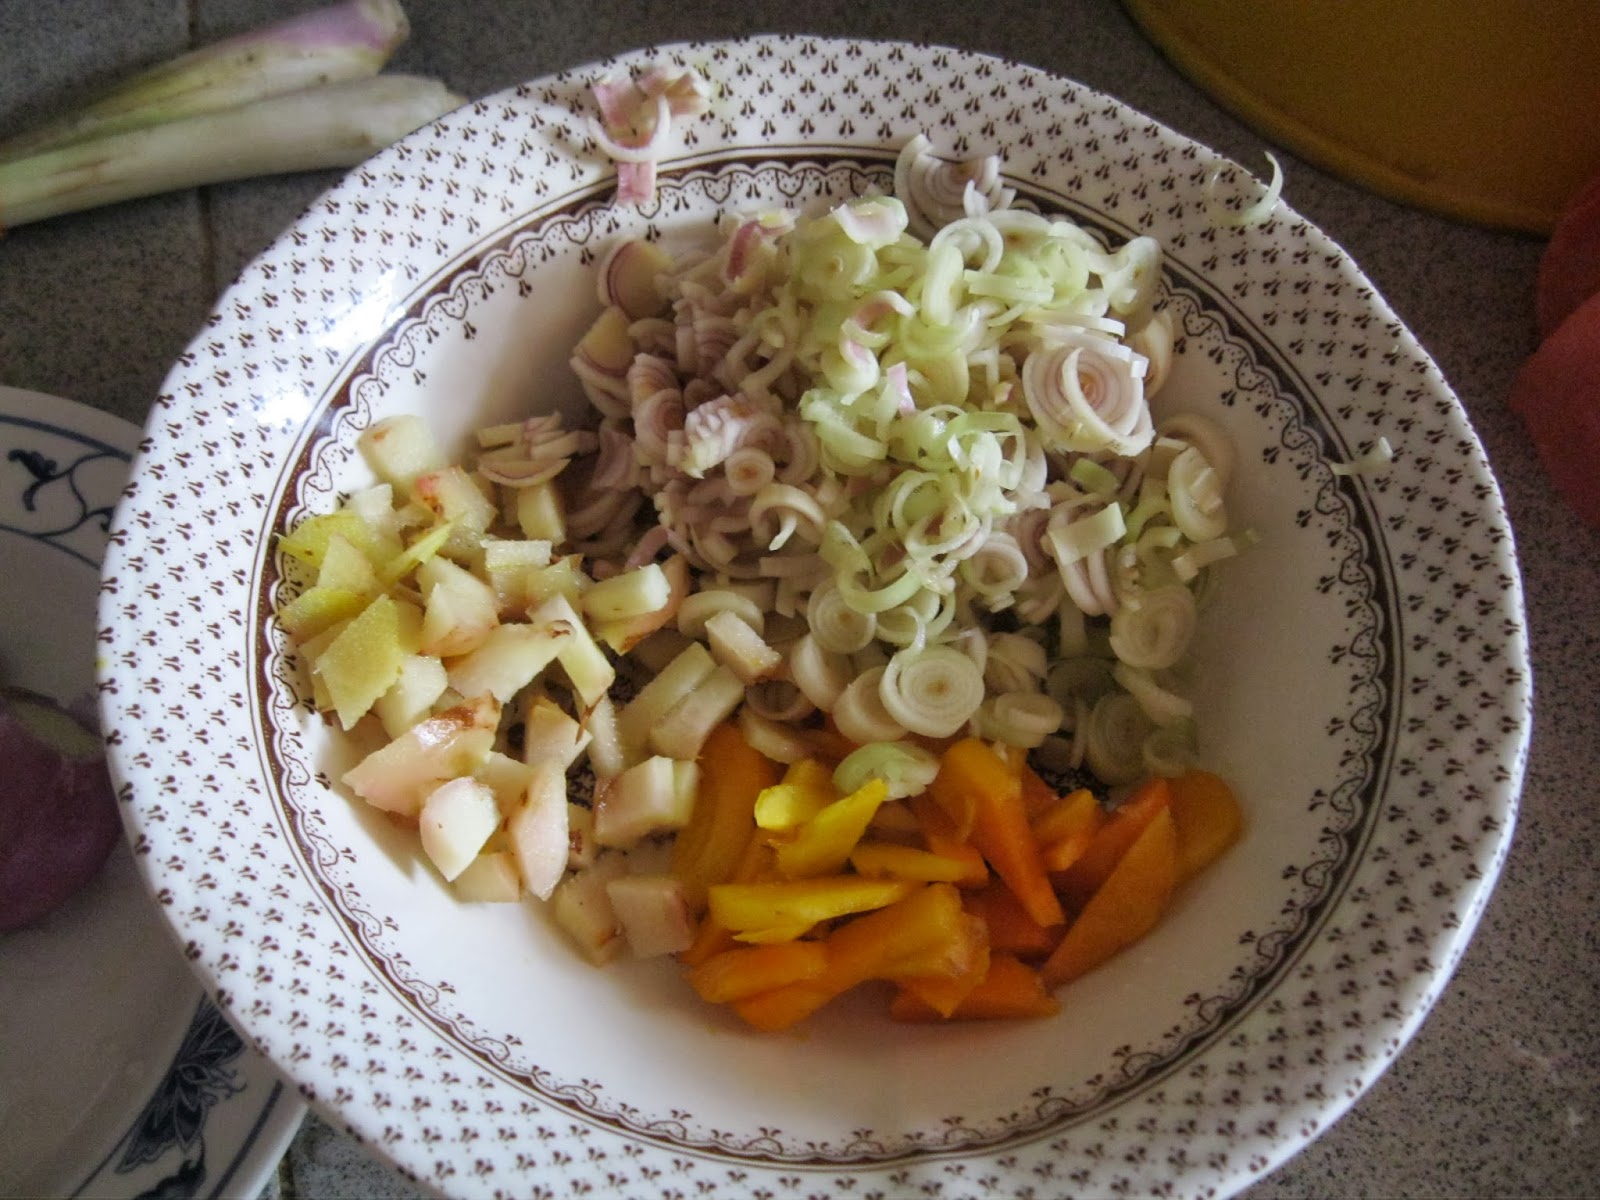
| Picture 9. This shows you the cut lemon grass, yellow ginger and galangga, for easy blending. |
 |
| Picture 10. The small onions peeled and washed, ready to be blended. |
 |
| Picture 11. This is the small blender that I used. I am blending the hard ingredients first, the lemon grass, candle nuts, yellow ginger, galangga and the small onions.The washed rice can be blended separately to get a better result. |
|
 |
| Picture 12. This is the result of the first blending of the spices. |
 |
| Picture 13. Blending the dried chilli that has been boiled and some of the seeds removed. |
 |
| Picture 14. The result of the blended chilli. Just use what you need, the rest can be stored and used later for something else. |
 |
| Picture 15. This is the fish that we are going to use. About 1.5kg grouper from the main market. Remember, if you want to cook a bigger fish or more, you must also increase the other ingredients too. |
 |
| Picture 16. Mummy asked me to fillet the fish and just use the flesh without the bones. Easier to eat. Less messy. |
 |
| Picture 17. Cut the fillets into smaller pieces for easy picking. |
 |
| Picture 18. This is the "Daun Gado-gado" that must be used to get the typical flavour, aroma and taste of Otak-otak. Without these leaves, the taste is not there. Some people may not like the taste of these leaves. |
 |
| Picture 19. You can grow this plant quite easily in a pot. It is a creeping plant. You can see the vine below the pot. Grow a few pots if you like. The plant will take some time to grow new leaves, once you harvest them for your Otak-otak. |
 |
| Picture 20. The fillets have been cut into bite size and put aside. |
 |
| Picture 21. The blended spices and all the other stuff are put into a mixing bowl and stir. |
 |
| Picture 22. Add in the coconut suntan into the mixture and stir. |
 |
| Picture 23. The mixture is been stirred slowly as the coconut suntan is been added. |
 |
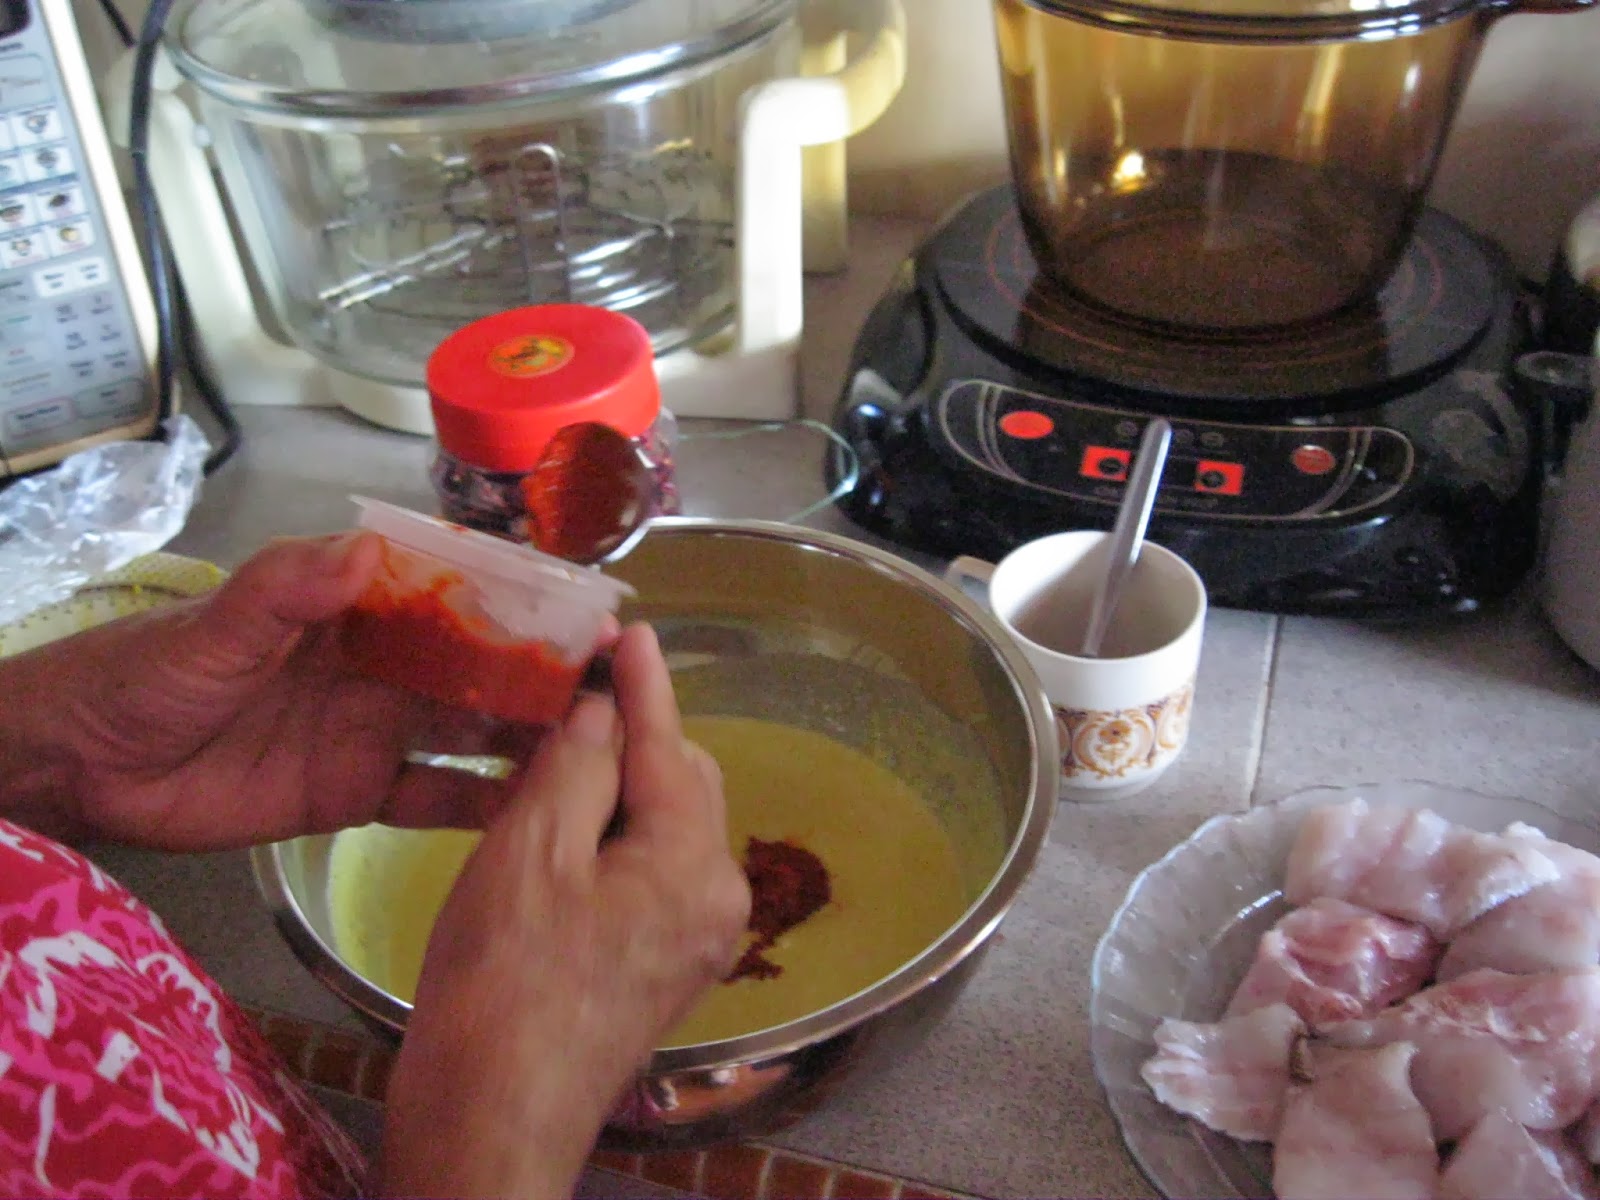
| Picture 24. Don't forget to add some salt! |
 |
| Picture 25. Now you can add in the chilli according to your taste. Less chilli if children are eating too. |
 |
| Picture 26. After adding the chilli, stir the mixture well. |
 |
| Picture 27. Crack an egg, beat it and add it into the mixture. You can skip this egg if you don't like eggs. |
 |
| Picture 28. Beat the egg good and proper. |
 |
| Picture 29. Pour the egg into the mixture. |
 |
| Picture 30. After adding the egg, stir the mixture again. |
 |
| Picture 31. Now you can add in the fish pieces. |
 |
| Picture 32. After adding in the fish, stir the whole thing again, so that the fish is completely coated with the spices. |
 |
| Picture 33. Leave the fish to marinate for some time, say about half an hour to an hour. |
 |
| Picture 34. Keep the marinating fish in the fridge for an hour or whenever you are ready to cook. |
 |
| Picture 35. The fish in the fridge. Note the kefir drink by the side. |
 |
| Picture 36. Line the steel plate with gado-gado leaves and arrange the fish pieces on top of the gado-gado leaves, around the plate. |
 |
| Picture 37. Mummy arranging the fish on the steel plate, using a large spoon. |
 |
| Picture 38. You can see the pieces of fish arranged on the steel plate on top of the gado-gado leaves. |
 |
| Picture 39. The balance of the spices is then pour over the fish, covering them. |
 |
| Picture 40. Then using a special tong, lift the steel plate and bring it to the steamer, as shown below. |
 |
| Picture 41. Mummy putting the prepared fish into the hot steamer. You can start heating the steamer while preparing the fish, so that the steamer will be ready when you have finished preparing the fish.. |
 |
| Picture 42. Steam for half an hour to 45 minutes. |
 |
| Picture 43. The finished product! Ready to be eaten! |
 |
| Picture 44. A close-up of the finished product. |
 |
| Picture 45. Otak-otak on the table. |
 |
| Picture 46. After saying graces, we are going to eat. |
 |
| Picture 47. Annette is taking the first scoop of the otak-otak. |
 |
| Picture 48. Mummy is taking the second scoop! |
I hope you will try this out and enjoy this dish as much as we do. Whenever mummy cooks this dish, it is a real treat and we always look forward to eating it. If you have not any gado-gado leaves in your garden, don't worry. This is a very common "weed" which can be seen in the wild. If you are lucky, you may even find them in your neighbour's backyard.
Pa.


No comments:
Post a Comment