
Hi there,
Today, 20th. June, 2014, mummy cooked crab rice for dinner. I would like to write it down while it isstill fresh in my mind.
Ingredients:
(1) Two crabs.
(2) 4 cloves of garlic.
(3) 2 small onions.
(4) One and a half inches of ginger.
(5) Oyster sauce.
(6) Linseed oil.
(7) Cooking wine.
(8) White rice (Basmathi- Mongul)
Method:
Cut the crab into two. Brush away the dirt with an old tooth brush under running water. Remove the lungs and the stomach (Important - If you don't remove the stomach,it may upset your stomach). Then cut into quarters. Crack the pincers to allow the juice to flow into the rice, keep it moist too. Keep it in the fridge until ready to cook.
Clean and julienne the ginger and put it aside.
Clean two small onions and cut into slices and put aside.
Clean and chop 4 cloves of garlic and put aside.
Cooking:
Heat up the kuali and then pour in about 4 tablespoonful of linseed oil.
First put in the ginger and stir it. Then add in the onions and stir until aromatic.
Then put in the garlic and stir for awhile.
Next put in the crabs and mix thoroughly with the ingredients.
Then put in the rice which has been cleaned in a big sieve. No water yet. Stir well.
Add in some oyster sauce, a capful of cooking wine and some salt (a pinch will do).
The flame must be lower at this point.
Stir everything well. Finally pour in some water. The water must not be more than two times the rice in volume. If you use one cup of rice, then the water must be two cups.
Let the whole thing boil for some time.
Then scoop the whole thing into the rice cooker and let it cook.
Then serve while it is hot.
Enjoy!
Additional Ingredients to enhance the taste:
Lala -- you can add in some lala to the crab rice.
Prawns -- peeled and de-veined before adding in. Sea prawns will taste better than pond-bred ones.
Meat -- chicken, pork. Cut into small pieces before adding in.
Crab -- you can increase the number of crabs to three or four if the crabs are too small.
When adding in the above additional ingredients, they must not be too much. One or two of the additional ingredients should suffice and in small quantity.
Pa.
21/06/2014
30/11/2013
Sweet Honey Chicken Drumstick.
Hi there,
Today, 29th Nov. 2013, mummy decided to cook "Sweet Honey Chicken Drumstick" for me. So it will give me an opportunity to record the ingredients and the methods for cooking this dish. This will enable all of you to cook this dish even when mummy is not around. I will write in as much details as I can, so that with this recipe, anybody can cook this dish. By the way, no honey is used. Beside chicken drumstick meat, other types of meat can also be used. The trick is to cut the meat into thin slices, so that a larger surface can be created to be coated with the caramel and the various sauces.
This morning, I went to the wet market to buy 8 drum sticks and I asked the lady to de-bone two drum sticks for me. She did it in front of me in 5 minutes flat, both drumsticks! I saw how she did it and I think I can do it too. Anybody who is interested in learning how to debone a chicken drumstick, I am willing to teach him or her. Unfortunately, I can't film and cut the drumstick all by myself. Somebody got to film while I debone the drumstick.
After the drumstick has been deboned, it must be cut into thin strips of about half an inch thick. The thin strips will enable the meat to be cooked quickly.
 |
| Picture 1. The chicken drum stick that has been deboned by the market lady. The meat is easier to eat. |
 |
| Picture 2. The meat is cut into strips of half an inch thick. Mummy was not very happy with the pieces of meat that I have cut. She said the slices are too thick and too long. Here a sharp knife will be an assets. |
Then the following ingredients are added to marinate the meat:
(1) Half a teaspoonful of pepper, or more if you like it to be a bit spicy.
(2) One tablespoonful of good soya sauce, no more. (For one drumstick meat)
(3) 3 tablespoonful of white sugar -- heaps, or 4 tablespoonfuls.
(4) One tablespoonful of tomato sauce.
 |
| Picture 3. Pepper is freshly ground onto the meat. This method would be quite difficult to measure the actual amount of pepper used. Just trust your gut feelings regarding the amount of pepper that you need to grind. |
 |
| Picture 4. One tablespoonful of good soya sauce should be enough. More meat means more soya sauce. |
 |
| Picture 5. Put in 3 to 4 tablespoonful of white sugar. Mummy said that you can put in 4 tablespoonful of sugar for any amount of meat, as long as the caramel can coat all the meat. |
 |
| Picture 6. Finally add in a tablespoonful of tomato sauce. |
 |
| Picture 7. Mix the whole thing with two spoons until all the meat is coated with the ingredients. Store in the fridge to marinate. |
 |
| Picture 8. Use 4 cloves of garlic, skin them and them mince them. |
 |
| Picture 9. The garlic is minced before cooking. Only garlic is used in this dish. |
Mix everything thoroughly with two spoons and let it marinate in the fridge for half an hour. Mummy said that you can start frying after mixing the ingredients into the meat. No need to marinate for long.
 |
| Picture 10. You start cooking by pouring about 3 to 4 tablespoonful of oil into the wok. heat it and then add the garlic. |
 |
| Picture 11. Minced garlic is added after the oil is hot enough. Make sure the garlic is not burnt, because it will cause the dish to become bitter. |
 |
| Picture 12. The meat is then added when the garlic is aromatic. Make sure the sauces from the plate are completely poured into the wok.Stir and fry the meat constantly, searing the meat. |
Cut up four cloves of garlic into small pieces and fry this for a while first before you pour in the meat and all the sauce that were on the plate. Don't burnt the garlic. then the dish will become bitter.
Fry the meat for a while. At this point control the flame.
 |
| Picture 13. Fry the meat, searing every piece and do not allow the meat to stick to the wok. Notice the empty plate. |
 |
| Picture 14. After searing the meat, add in a cup of water to cook the meat. Stir and fry the meat. If a lot of meat, put in a bit more water to cook the meat longer. At this point you can let it simmer for a while. |
 |
| Picture 15. After adding the water and stirring it, let it simmers for a while to cook the meat. Control the flame. |
 |
| Picture 16. The meat is almost done. The sauce is almost changed to oil only. Note the burnt wok. When stirring do not stir to high up the wok. This is the result. Stay focus on frying the meat. To clean the burnt wok, pour in some water and let it boil. Stir and the burnt parts of the wok will come out quite easily. So don't worry about the burnt wok. |
 |
| Picture 17. The finished product! Sweet Honey Chicken Drumstick. It's yummy and delicious. Try it. |
After searing the meat properly, add a cup of water to the whole thing and let it cook until the meat is done. Slowly increase the flame. You must continue to fry all the time. If the ingredients are correct, the whole thing will change to BBQ meat when the water is evaporated. One of the possible source of errors is the amount of sugar. If you did not put in enough sugar it will fail. The safest thing to do is, put in 4 tablespoonful of sugar for any amount of meat, according to mummy.
Source of errors:
(1) My meat was too thick. And too long. Should be thinner and in smaller pieces. Larger surface areas.
(2) The sugar was not enough. You cannot correct your mistake half way through the cooking. You cannot put in additional sugar half way through your cooking. You have to perfect the amount of ingredients by trial and error. Use the same amount of meat each time and measure the ingredients correctly and note it down. You should be able to perfect it by the second or third trial.
(3) Mummy said the stainless steel wok was not working for her. I suggested the cast iron old fashion wok used by my grandmother and my mother. She kept quiet. She doesn't have one. She has every kind of wok except the cast iron one. DO NOT USE THE NON STICK WOK/PAN. You want the meat to be a bit burnt. Then it will be very aromatic.
Because mummy was cooking this dish, it turned out edible and I polished it off. I would say it was quite good. Try it.
Pa.
12/11/2013
Sambai Hay Bee (Sambal Dry Prawns - Taiping Lang Style.)
Hi there,
This recipes has been a long time coming and is finally here. Today, 10th Nov. 2013, mummy has prepared to cook the dish which has become one of Nic's favourite dishes. Andrew introduced this dish to Nic when he was about 10 years old, I think, and he has come to enjoy it. Anyway, this time round, I was able to photograph the various ingredients and some of the steps of cooking this dish. Hopeful I would be able to write a comprehensive account of how to cook this delicious and delightful dish. Now everybody can follow the steps and cook this same dish and enjoy it.
The Ingredients: You will need the following:
(1) Half a kilogram of GOOD dry prawns. Make sure the dry prawns are the good, expensive ones.
(2) Half a kilogram of GOOD small onions (shallots). There are many types in the market. Ask the shop-keeper for the GOOD type, with an aromatic taste.
(3) About 12 to 14 sticks of lemon grass.
(4) About 2 inches of fresh yellow ginger. Fresh yellow ginger taste better than the powder type.
(5) A bundle of special lime leaves. Tai Ko Kum Huio (Daun limau perut)
(6) A handful of dry chilli, not the hot spicy ones. Ask the shop-keeper for the NOT spicy ones.
 |
| Picture1. These are some of the main ingredients that you need. Half kilo of small onions and dry prawns, 12 to 14 sticks of lemon grass, about 2 inches of fresh yellow ginger. |
 |
| Picture 2. Buy a bundle of "Tai Ko Kum Huio" from the wet market. If you have some land, plant a lime tree. You can also plant it in a pot. Then you can choose the most succulent leaves from your own plant. |
 |
| Picture 3. Pick the best leaves, roll them up and cut the leaves into thin slices. |
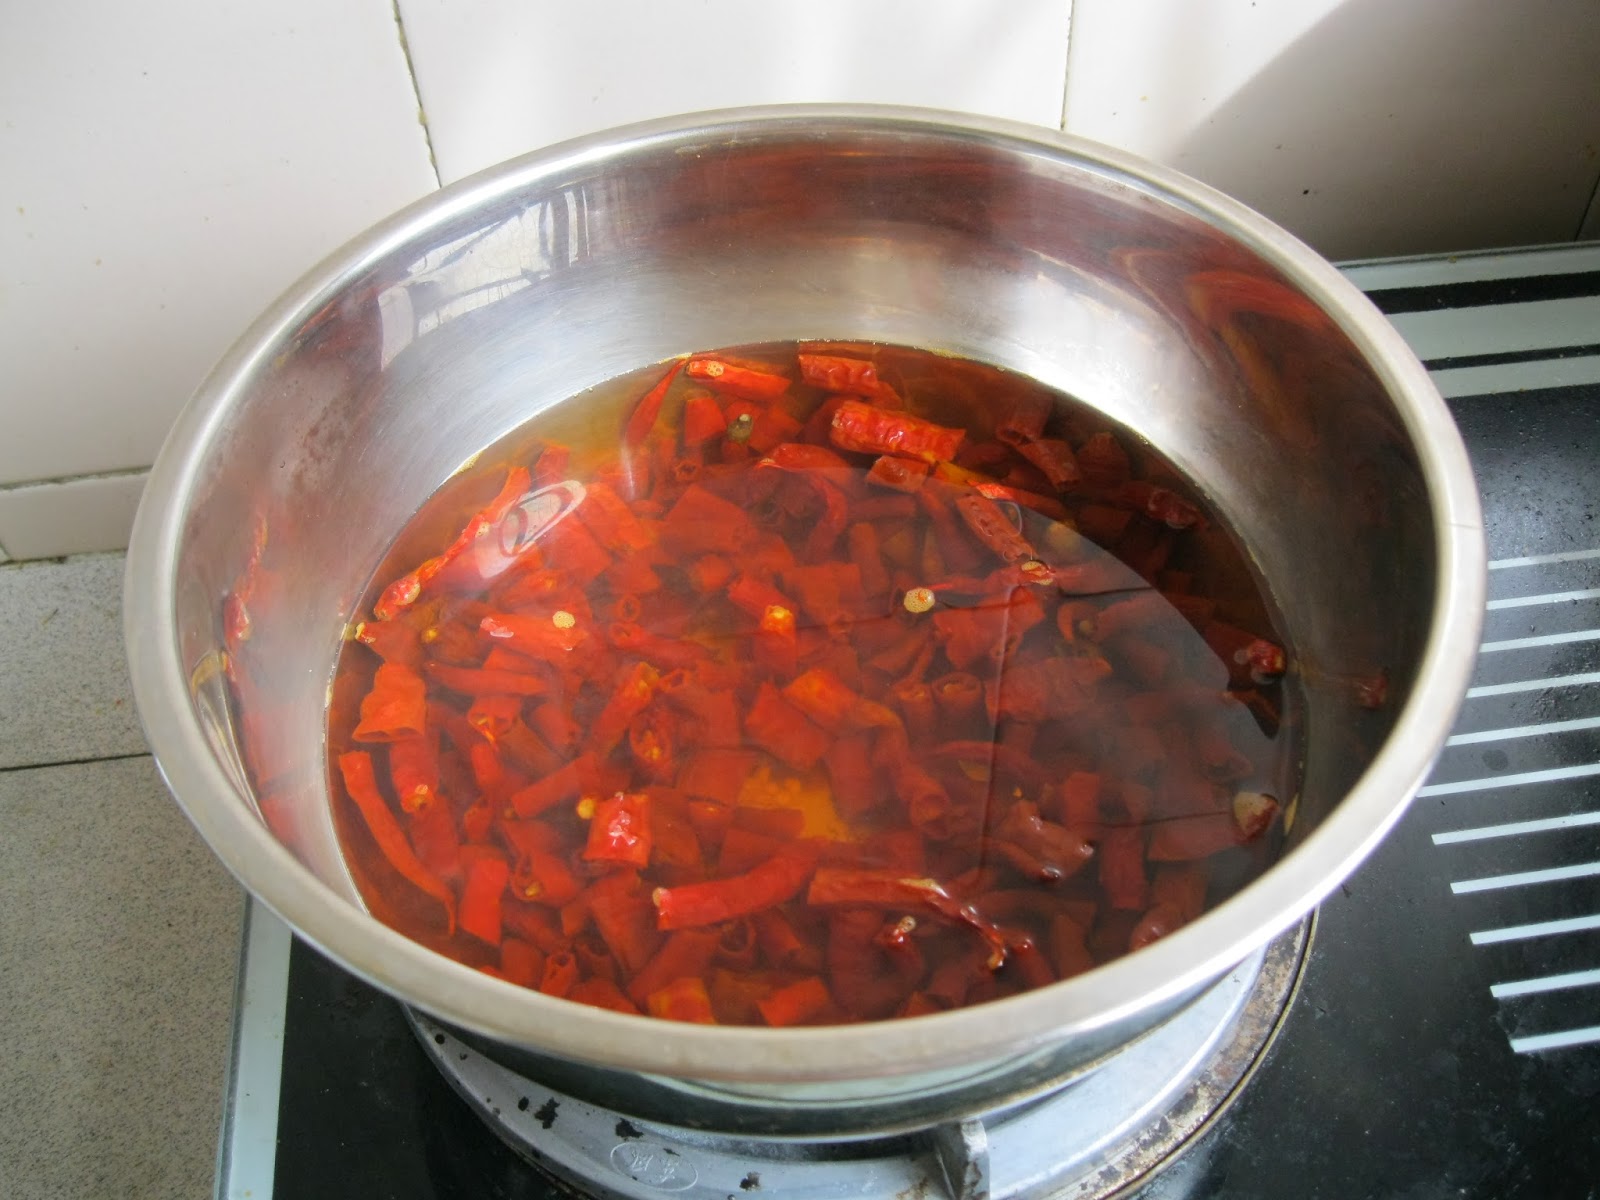 |
| Picture 4. The dry chilli are boil and let soak in the hot water to soften them for easy blending. |
 |
| Picture 5. The dry chilli has been soak in hot water and is now ready to be blended. |
 |
| Picture 6. The small onions are peeled, washed and ready to be blended. |
 |
| Picture 7. The dry prawns are checked for dry shells and any matters that should not be there before they are washed. |
 |
| Picture 8. The dry prawns are washed and now drip-dry in a big sieve, ready to be blended into fine fibers. |
 |
| Picture 9. The lemon grass are peeled, cleaned and ready to be cut into slices. |
 |
| picture 10. The lemon grass are cut into thin slices. The yellow ginger beside the chopping block is sufficient. |
 |
| Picture 11. The lemon grass and the fresh yellow ginger have been cut and ready to be blended. |
Methods:
Preparation:
You have to get ALL the ingredients ready before you can start cooking. If you have some helpers, then you can delegate the work to some of them. One helper can peel the small onions (Shallots). Another can wash and drip-dry the dry prawns, and after a few minutes, blend the dry prawns into fine fibers. Another helper can trim and wash the lemon grass and then cut into thin slices... cross wise. Ask another helper to boil the dry chilli for about ten minutes and then leave them to soak for another ten minutes to make them soft. Wash and peel the fresh yellow ginger and cut into smaller pieces. If you can multitask then you can do all the work by yourself. So while the dry chilli is boiling, you can wash and drip-dry the dry prawns. After that you can peel and wash the small onions . . . .
Blending:
(1) Blend the dry prawns first until fine. Put it aside.
(2) Blend the lemon grass with the cut yellow ginger until fine. Put it aside.
(3) Blend the dry chilli by itself until fine. Put it in a container and put it in the fridge.
(4) Blend the small onions. This doesn't have to be fine.
(5) Row the lime leaves and cut into thin slices. Put them aside. Use the medium aged leaves. They taste better then the old ones. The old ones are tougher and harder to chew.
 |
| Picture 12. The blended dry prawns is cooked separately in a hot wok without any oil. At this stage, controlling the fire is the most important factor here. |
 |
| Picture 13. The dry prawns cooked and scooped up ready to be added when the spices are cooking |
Cooking:
(1) Fry the blended dry prawns WITHOUT using any cooking oil until aromatic. This is where the control of the fire will determine the success or failure of this dish! Too low a fire, you will take a long time to finish cooking the dish. Too high a fire you will burn the prawns. So the trick is to alternate high and low fire to have a constant high heat without burning the dry prawns. Then scoop out the cooked dry prawns into a clean container and put it aside. This stage of pre-cooked dry prawns is very important to have a flavourful dish without a fishy smell! Some people didn't carry out this step and the dish tasted fishy.
 |
| Picture 14. With a clean wok, half a cup of oil is heated up before the spices ingredients are added in, one at a time. |
 |
| Picture 15. Fry the spices until aromatic. Control the fire and stir fry constantly to avoid burning the ingredients. This is a very crucial stage in the cooking process. |
(2) Pour half a cup of cooking oil into the wok, heat it up. Then add in the blended lemon grass together with the fresh yellow ginger, the blended small onions, blended dry chilli and stir fry until completely cooked and aromatic.
(3) Now put in the pre-cooked dry prawns and stir fry again, mixing everything well.
 |
| Picture 16. After the spices are cooked and aromatic, the dry prawns are added to it and then stir fry and thoroughly mix the whole wok. Salt and sugar are added. For half a kilo of the main ingredients, one and a half teaspoon of salt is added and six tablespoons of white sugar or slightly more depending on your taste. |
 |
| Picture 17. The lime leaves cut into thin slices are added and stir fry again to give the dish the typical aroma. |
(4) Finally, before you scoop it up, put in the cut lime leaves and stir fry again. At this time, you will smell the typical familiar aroma of "Sambai Hay Bee".
 | |
| Picture 18. The dish is ready to be served with sliced Japanese cucumbers and organic cabbage leaves. |
 | |
| Picture 19. The excess is kept in plastic containers and deep freeze. When you want to eat it again, you can re-heat in a microwave oven. Just microwave the amount that you want to eat and put the rest back in the freezer. The amount that you re-heat can have a dash of lime juice to enhance the taste. You cannot add lime into the whole container as the content will spoil. |
Pa.
31/10/2013
Black Vinegar Pig's Totter -- Tkee Ka Chor
Hi there,
Today, mummy decided to cook "Black Vinegar Pig's Totter", (or in Hokkien "tkee ka chor" , or Cantonese "chee keok choh") one of my favourite dishes which I have come to love very much. It has a sweet-sourish sauce full of meaty goodness and a lot of collagen which is very good for arthritis and rheumatism in old people. To cook this dish, you must have the black vinegar sauce, pig's totter (half totter for two people and the whole leg for a family), good ginger (Bentong's the best), a bit of sesame oil and rock sugar for sweetness.
The first thing is to clean the pig's totter which the butcher had cut into bite sizes. Clean the pieces under running water to remove small fragments of bone from the chopping. Use an old shaver to remove any hair remaining on the skin. After that put the chopped pieces aside.
 |
| Picture 1. This is half a pig's totter cut into bite sizes. There are small fragments of bones sticking on the bones and these must be removed so that you may enjoy eating the meat. |
 |
| Picture 2. The picture shows some old gingers, with one piece crushed (inside the bowl) with the pestle on the left side of the picture. There is a small bottle of the black vinegar in the centre of the picture. You can get this from any Chinese sundry shop. You only need to use about a cup of it. The rest you just add water. |
You need to fry the crushed ginger with sesame oil, to give it the desired aromatic smell and taste. get a good sesame oil. We always buy "Ghee Hiang Sesame Oil". We don't trust any other brand.
 |
| Picture 3. This is the bottle of the branded sesame oil which we trust. Use about 3 to 4 tablespoonful of the oil to fry the old ginger. Do not let the oil burnt. Control the fire. |
 |
| Picture 4. Fry the crushed old ginger in sesame oil until aromatic. Medium heat should be sufficient. When the ginger is done, add in the meat and sear every piece to seal in the flavour. |
 |
| Picture 5. Add in the pieces of meat and fry. Try to sear every piece of meat. Again use medium heat. When the meat is done, then pour in about one cup of black vinegar, depending on the amount of meat. More meat, more black vinegar. |
 |
| Picture 6. Black vinegar is added at this stage. Notice the meat pieces are cooked. Use about one cup of vinegar, then pour in about half a litre or more of plain tap water, enough to cover all the meat. |
 |
| Picture 7. Tap water is add and then let the whole thing boil for some time. Too much water will dilute the sauce and it would not be nice to drink as soup. Rock sugar is added at this stage. You can also add the rock sugar later when the whole thing is being cooked slowly on the electric cooker. |
 | ||||
| Picture 8. You can buy rock sugar from the supermarket and store it in a plastic bottle to be used later. |
 |
| Picture 9. Scoop the whole thing into the stock pot and cook it on an electric cooker. |
 |
| Picture 10. Set the electric cooker to high and let the whole thing boil for about five minutes. After that lower the heat and let it simmer for 90 minutes or until the meat is soft. At this stage, you can add more rock sugar if the sauce is not sweet enough. |
 |
| Picture 11. The finished product ! The mystery of cooking this dish is uncovered. |
Initially, I thought that cooking the "Black Vinegar Pig's Totter" was very difficult and complicated, but after seeing how mummy did it, it was so simple! I am slowly overcoming my fear of cooking. If mummy can do it, and I have recorded it, then I can do it too! Anybody wants to eat "Black Vinegar Pig's Totter" for dinner? I'll cook for you. I'll put in an extra piece of rock sugar.
Pa.
29/10/2013
Kim Kua Pung -- Pumpkin Rice
Hi there,
Today, 28th Oct. 2013, mummy did her second cooking and secretly I felt very elated knowing that she was on her way to full recovery. Her appetite has improved tremendously and she is enjoying her food immensely. She is even enjoying her sambal-balacan with her rice! Annette roasted some balacan the last time she came back and kept some extra balacan in a sealed Brand's small bottle. I blended some red chilli with the balacan and kept it in the fridge. Each time she wanted the sambal-balacan, I would scoop a few teaspoonfuls into a small bowl and squeeze half a lime into it. She loves the sambal-balacan to go with her rice. After her detoxification last week, her appetite is even better. Praise the Lord!
Today, she cooked "Kim Kua Pung" or "Pumpkin Rice". The ingredients are about the same as that of "Tua Chye Pung", but with a slight difference. The pork belly is not boiled, but uncooked. It is cut into thin strips like julienne to be stir fry with the other ingredients. The pumpkin is skinned, washed and cut into cubes. Make sure that the pumpkin is really ripe or matured so that it will be sweet and "powdery" when cooked.
To make your work easier, it is better to get all the ingredients peeled,washed, cut and put aside so that when it is time to cook, you will have ALL the ingredients ready. You can also measure the rice, wash it and put it aside to be cooked together with the rest of the ingredients.
The belly pork is julienne, cut into small strips and put aside. There is no seasoning at all. The cut belly pork is to be cooked first and then the other ingredients are added.
When all the ingredients are ready, mummy will start cooking. The first ingredient that she put into the wok is the raw meat. She stir fry the meat until every piece is cooked and you can see some fat oil in the wok from the meat. If the fat oil is not enough, add a bit of cooking oil. Then add in the other ingredients. Mummy next put in the shallots and fry until aromatic. Then she put in the dry prawns, stir fry, follow by the fresh prawns, then the oysters and then the garlic. Next she adds some oyster sauce, some freshly ground pepper, a pinch of salt, a bit of soya sauce and fry the whole thing again. Then she put in the cut pumpkin cubes and finally the rice. Then she toss the whole mixture and give it a good stir. Then she add in a bowl of water sufficient to cook the pumpkin rice. She let the whole thing boil for some time before she scoop the whole thing into the pot. Then she transfer the pot into the cooker and switch it on. Done!
The following are some pictures to show the various steps to fry the all the ingredients.
Pa.
Today, 28th Oct. 2013, mummy did her second cooking and secretly I felt very elated knowing that she was on her way to full recovery. Her appetite has improved tremendously and she is enjoying her food immensely. She is even enjoying her sambal-balacan with her rice! Annette roasted some balacan the last time she came back and kept some extra balacan in a sealed Brand's small bottle. I blended some red chilli with the balacan and kept it in the fridge. Each time she wanted the sambal-balacan, I would scoop a few teaspoonfuls into a small bowl and squeeze half a lime into it. She loves the sambal-balacan to go with her rice. After her detoxification last week, her appetite is even better. Praise the Lord!
Today, she cooked "Kim Kua Pung" or "Pumpkin Rice". The ingredients are about the same as that of "Tua Chye Pung", but with a slight difference. The pork belly is not boiled, but uncooked. It is cut into thin strips like julienne to be stir fry with the other ingredients. The pumpkin is skinned, washed and cut into cubes. Make sure that the pumpkin is really ripe or matured so that it will be sweet and "powdery" when cooked.
 |
| Picture 1. The ingredients are as follows: a piece of belly pork, a section of pumpkin, some dry prawns, two pieces or more of dry oysters, some fresh prawns and some shallots and garlic. |
 |
| Picture 2. The rice is measured, washed and put aside to be cooked later with the other ingredients. Mummy usually would cook the rice for two meals as the trouble that she has taken to prepare all the ingredients is too much of a hassle to cook for just one meal. Normally she would just put the whole pot into the cooker again and just switch it on. Wah-la. Dinner is ready to be served! |
 |
| Picture 3. The pork belly meat is cut into small strips. |
 |
| Picture 4. The pumpkin is peeled (with the special knife), washed and then cut into cubes. |
 |
| Picture 5. The pumpkin is cut into small cubes and put aside ready to be added to the other ingredients. |
The following are some pictures to show the various steps to fry the all the ingredients.
 |
| Picture 6. Fry the cut meat first. Some fat oil could be seen. |
 |
| Picture 7. Then add in the other ingredients like dry prawns, oysters and fresh prawns. At this stage you can put in the soya sauce, oyster sauce, salt and pepper. |
 |
| Picture 8. Finally you can put in the cut pumpkin and the washed rice and fry together before you pour in the water to cook the pumpkin rice. |
 |
| Picture 9. The half-cooked pumpkin rice is then scooped into the rice cooker's pot with the spatula. |
 |
| Picture 10. The pot is then put into the rice cooker and switch it on. In less than 10 minutes, the pumpkin rice is cooked. |
 |
| Picture 11. Dinner is served. Although the plate may look piled up into a big heap, but most of it is pumpkin. The pumpkin rice is really delicious. The sambal- balacan is in the middle of the picture. I don't like balacan. It is not my thing. |
Subscribe to:
Posts (Atom)